Windows Server Core 2012 R2 Remote Management
In my last blog post I added certificate services to a server core installation.
Well as it turns out after some more hands on with server core I did it the hard way as Server 2012 brings with it a new level of remote or headlesss management.
When I first got this up and running I was pretty blown away by the experience.
What I’m going to walk though in this blog post are the configuration steps that are required in order to get remote management of the server core installation up and running via a dedicated management server.
In this lab I have 2 Windows 2012 R2 Servers
- 1 Server Core
- 1 GUI
I’m not going to include the steps that are required in order to get the VM’s installed.
I’m going to pick this up from the point that the installation is complete.
Once Server Core has been installed and you have created your admin password and logged in. The first thing to do is fire up SConfig in order to set:
- Server Name
- IP Address\Subnet Mask
- DNS Servers
- Remote Desktop
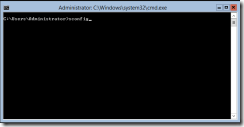
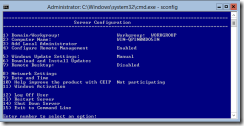
Running *sconfig *from the command prompt brings up the screen as below and allows basic server setup options to be configured
Select Option 2 and enter a computer name for the server. This requires a reboot once complete
Once the server comes backup and your logged back in run sconfig again and this time choose option 8 in order to set the IP Adresss, Subnet mask, Default Gateway and DNS Servers
Once complete that’s about all that needs done on the server core installation.
We can now switch over to the Management Server.
Configure this server up in the normal way, setting:
- IP Address\Subnet Mask
- Default Gateway
- DNS Server
- Server Name
Reboot the server and get logged back in.
As we are still to configure a domain we are effectively in a workgroup.
And as there is no domain there is no DNS for name resolution.
To work around these issues there are few steps that need to be taken.
- Add a host file entry for the DC on th emanagement server
- Add the would be Domain Controller to the trusted hosts file on the management server
Lets go ahead and take care of the easy task of assining the Domain Controller ServerName to the management servers host file
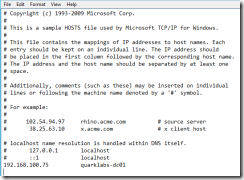
Open Notepad as administrator and then open:
C:\Windows\System32\drivers\etc\hosts
Add an entry for the domain controller similar to that below
Close the file and test name resolution via ping.
We won’t get a ping response due to the Firewall on Quarkalbs-DC01 but thats not the point. The point here is to test name resolution.
Now that name resolution is functional for QuarkLabs-DC01 the next step is to add the server to the trusted hosts file on the management server
Open PowerShell and run the following command
Set-Item WSMAN:\localhost\Client\TrustedHosts quarklabs-dc01 -force
All items are now set and we can go back to the Server Manager Dashboard on the management server and add our remote server
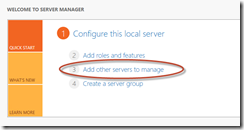
From Server Manager choose** Add other server to manage**
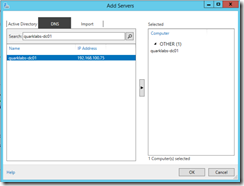
Select DNS and add the remote server
Click OK and wait for a moment while the remote server is added.
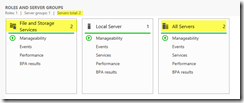
The server count should have increased from the dashboard
Open All Servers and be sure that the recently added server is now present
The server can now be managed via the management server like any normal server.
That wraps it up for this post. In the next post I’ll configure and promote the server to be a domain controller all via the management server.
.
