Building NVidia GRID and XenDesktop POC – Part1
It’s always exciting to get your hands on some new technology that breaks the mold when it comes to deploying VDI and applications on Citrix. For years, using CAD and high end graphics has been a no go area on shared desktops hosted on Presentation Server or XenApp. The best you could probably achieve would be CAD viewer for some light review work – no chance of full blown Auto-Cad or video editing software. You really needed to keep your big workstation PC or MAC with expensive hardware to do any serious work. More recently though Citrix have been able to connect you into dedicated PCs or blade-PC hosted in you data center with much improved graphics and capabilities for rendering images and video. We have had some success with this in hospital environments where medical staffs can remote in to their desktop and review x-ray and other patient videos from their home PC of tablet.
NVidia GRID and XenDesktop really do change the game. With dedicated Graphics Processing Units that you can allocate to your Windows PCs – the days of using hardware PC or blade PCs are banished. The NVidia cards can be fitted into a server running XenServer 6.2. A XenServer plugin then allows access to the GPU and the XenDesktop Agent talks to the hardware. The result is quite spectacular! The POC I have been working on recently involves users in India accessing a XenDesktop Windows 7 PC in a server room in Northern Ireland. That’s a looonnng way away to be using a CAD application over a 3G connection. Results? “Better than a desktop PC” was one user’s feedback.
So here are some tips.
Make sure you have all the cards, cables and components to put in the server. Check you have enough network ports, and switch connections for storage. 
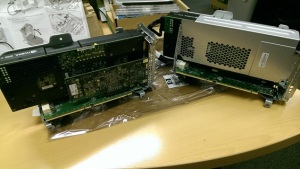
I was using HP DL380g8 servers with 2 NVidia GRID cards per server. To fit these, you need to order alternative PCI riser cards with cage from HP – and you need two different parts. One has an additional PCI slot, the other has not. The additional PCI slot is critical as you need this to facilitate another PCI card – in my case a HP dual port HBA for connecting to the fiber channel SAN. Without this, you’re pretty stuck with only local storage, unless you’re using iSCSI perhaps.
You’ll also need a set of torque screwdrivers as the cages (that house the NVidia cards) have tiny screws that would be easily damaged if you try to force them loose with something else.
It’s also worth ordering your server with on-board 10GB NICS instead of the standard 1Gb NICS. This will provide better connectivity that the standard 4 port 1Gb NIC card.
To fit these new risers and cage – you need to remove the CPU heat sinks and grab handle on the mother board and replace these with new ones that fit with the cages. If your happy enough to do that, make sure you have an anti-static wrist band and be very careful not to drop any screws into the server.
If you have all the cards, cages and cables – you can do it all in one go instead of having to rack and stack the servers and then come back and have more downtime.
*BIOS *– After installing the cards – go into the BIOS and make sure the on-board graphics card is still the main display card. If your server is set to use the external or extended graphics card as the main one – you won’t be able to see anything on the console, or on the iLO card for remote management.
Then you’re ready to install XenServer 6.2 + Spk1 , and add in the NVidia graphics plugin. Check here – https://www.citrix.com/go/private/vgpu.html
This needs to be copied to the root folder of the server using WinSCP or similar tool. Once installed, the XenCentre tools should show a new tab for GPU.
RAM – Make sure your server is fully loaded with as much RAM as you can get. If you’re running a CAD application like Auto-Desk or Creo you’re going to need a minimum of 16 Gb per Windows 7/8 virtual PC. If you need more per PC, you won’t be long running low on resources.
In deploying an initial server for a proof-of-concept, I limited the number of users to six. After building the OS, and installing the NVidia drivers, you then install the XenTools as normal and you’re ready to install whatever software you need. I left this to the customer to do while I created the Machine Catalogs and Delivery groups in Desktop Studio.
More later..
Citrix Reference doc:
NVidia: